Introducing LambdaCD
Preface
In my last post I argued that we should start treating our build pipelines as code, as potentially complex applications that serve a single purpose: To test, publish and deploy your software.
What I didn’t mention was how to get there. Do I want everyone to throw away their beloved Jenkins and go develop their own buildservers?
Well, yes, but I also want to do the heavy lifting for you:
Introducing LambdaCD
LambdaCD is a library that gives you
- An execution engine to execute your build steps one after another (and stops on failure)
- Persistence and and API to access state and history of your pipeline
- A basic UI to visualize and interact with your pipeline.
- A few basic building-blocks for your pipeline, e.g. manual triggers, parallel execution of steps, …
What is left for you to do is code the structure of your pipeline and your build-steps. Build steps are regular Clojure functions that take input data and return a map with results. The structure of your pipeline is a nested list of such functions.
In short, this is what you code:
(defn some-step-that-does-nothing [& _]
{:status :success})
(defn some-step-that-echos-foo [_ ctx]
(shell/bash ctx "/" "echo foo"))
(defn some-step-that-echos-bar [_ ctx]
(shell/bash ctx "/" "echo bar"))
(defn some-failing-step [_ ctx]
(shell/bash ctx "/" "echo \"i am going to fail now...\"" "exit 1"))
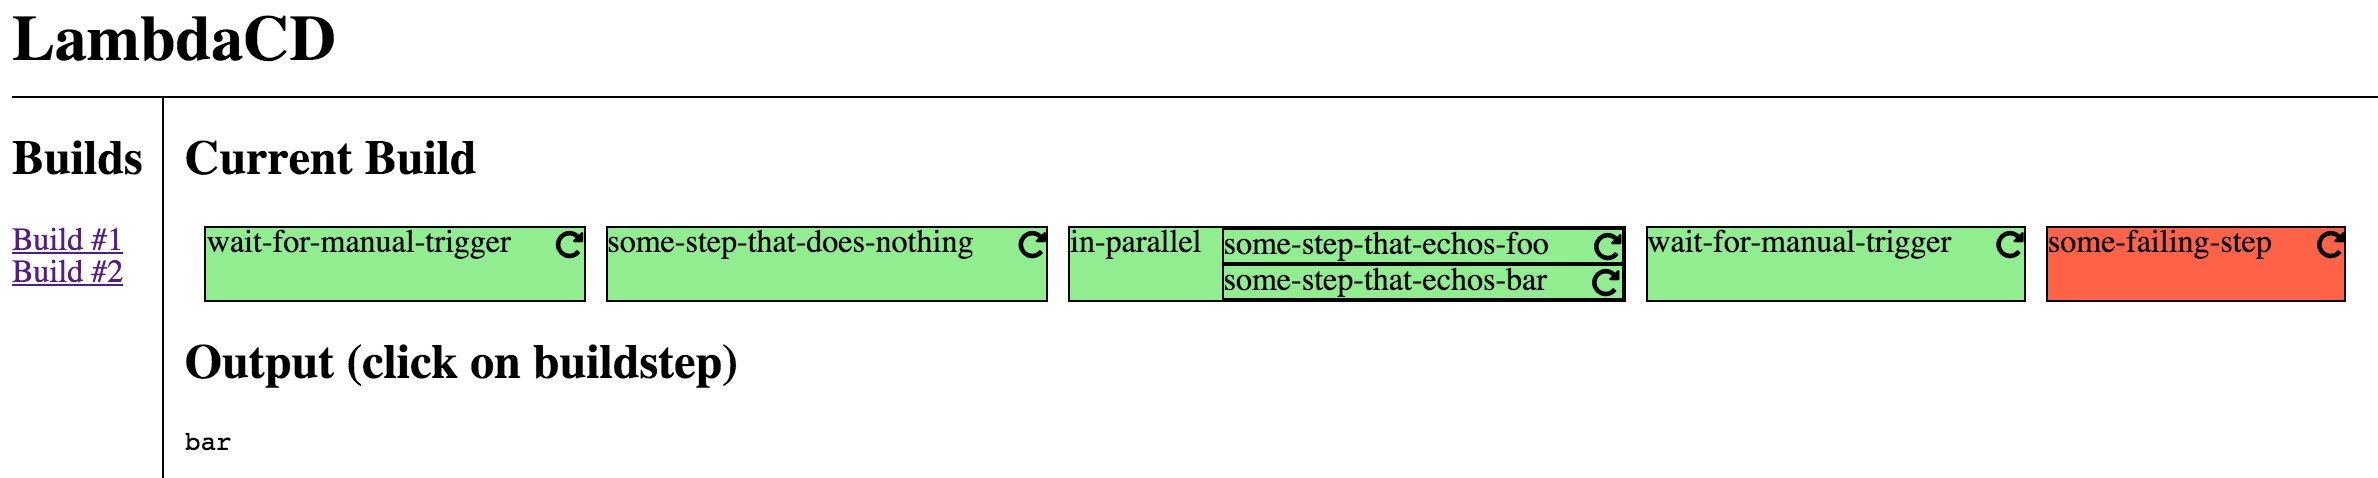
(def pipeline-def
`(
lambdacd.manualtrigger/wait-for-manual-trigger
some-step-that-does-nothing
(in-parallel
some-step-that-echos-foo
some-step-that-echos-bar)
lambdacd.manualtrigger/wait-for-manual-trigger
some-failing-step
))And this is what you get: (yes, I know this isn’t stellar web design)
Getting started
The easiest way to get started is to use Leiningen to generate a project for you: lein new lambdacd <SOME-PROJECT-NAME>. This will create a project for you that you can run using lein run. lein uberjar creates a self-contained jar-file that can run on any server with java installed. That’s all you need for your very own, custom built build-server!
Now go ahead, have a look at the generated code, play around a bit and then come back, tell me what you think.